Saturday, 29 September 2007

Decorated airdry clay beads


I tried colouring the beads with colour sprays which did work but didn't give me the density of colour I was looking for. The pink and green beads are coloured with the sprays. I used acrylic paint for the blue and green beads and some silver rub'n'buff to bring out the patterns. I used coloured metallic rub-ons for the other beads (the clay was white) and I like the look of these but I don't know how long it will take for the metallic rubons to dry (if ever). If it doesn't dry I may have to coat them with varnish.

Update: The metallic rubons didn't really dry so I put some UTEE onto them and it stuck to the coloured pattern. Heated and it gave a glassy finish to the beads too.

Wednesday, 26 September 2007

Air dry clay beads


I used some air dry clay to make some beads. This is a photo of them drying - the impressions on them are made from an unmounted rubber stamp sheet but don't show up too well on these unpainted beads. I am hoping when I decorate them the patterns will show up better.

Monday, 24 September 2007

Slip cover for a notebook


Making little books

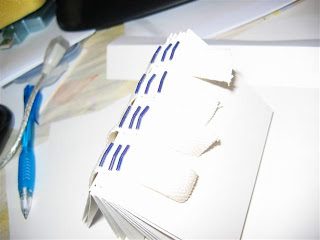
Carol (not sure which one) asked me for instructions for a little book so here it is briefly. For my books I make 5 sections of folded over paper for the pages. Some of the books have little pockets for ATCs which I make out a folded triangular piece of paper. I then make a book with a mixture of plain pages and ATC pockets. So you have five sections folded in the middle. Decide how many tapes are going to use on the spine and space them evenly across the spine. Make a template of where the holes will be - one either side of each tape and one at top and bottom. Prick holes in each section.


I attach the tapes with a bit of easily removed tape to the first section the starting at the top sew in and out of the holes attaching the tapes. I add beads to the first, third and fifth sections. Add each section at a time and finish top and bottom with kettle stitch. (I think you will find the sewing instructions in lots of places). Found an example from a quick google search here .


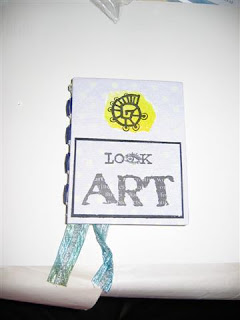
Make a cover out of mount board and cover with paper or decorate and then sandwich the end of the tape between that and a plain inside cover almost the same size. Glue together and then decorate the cover. Attach the ribbon to the top line of stitching to make a place marker.


More beads


Got to work and created enough coil beads for the swap. Phew.

Also had a play with paper beads. Used some background I'd made ages ago with acrylic paints and cut into skinny triangles or rectangles. Glued them up into coils. Got as much glue on me as on the beads. Sticky! Next stage will be to add some thing pretty and some glaze like finish.

Friday, 21 September 2007

Wire beads


The results of playing with wire coiled beads.

Little books


Been playing with little books with beaded spines

Thursday, 13 September 2007

Wednesday, 12 September 2007

Texture page


As part of the Trish's Art Quest challenge I had to find a sketchbook and start the first page spread with some texture. I used hacked up bits of muslin, glued it down then used adirondack dye ink pads to colour it. Here is the plain page. I now have to make it into an altered book page. Will post when I've done that

Friday, 7 September 2007

Mini ATCs


My first attempt at mini ATCs - 1.5x2.5 inches. The theme of the swap was Autumn Colours so I stuck with the obvious. I am pleased with how these turned out - I found this size much easier to deal with than inchies. In real life these have very shiny gold leaves

Geodeco thingy


I used the tutorial for geodeco thingies from After Midnight to make one for a swap. Some people have sent in pictures of the ones they made for the swap into the gallery there. There are two other galleries with lovely examples too.

Wednesday, 5 September 2007

Doodle ATC for the swap


This is the final design for the doodle swap and I have just made 10 of them, phew.