Sunday 27 September 2009

The Stamp Moves

I participated in a swap where each person in the group sends round a stamp for each person to use. Here are my finished ATCs.


Rosie's stamp. Stamped onto glossy card and then distress inks sponged on top. Used some black german scrap to finish off.

Adrienne's stamp. I sprayed some card with red glimmer mist. I then sprinkled over some UTEE and heated until molten then stamped using some black ink. I then used the stamp on a fragment of polymer clay.

I use a background sprayed with ink sprays and stamped the picture and text. I used a black marker to add the borders and a silver pen to pick out the text.

I used a dictionary page painted with watered down gesso and then coloured using watercolour crayons and water. The image was stamped on a piece of background made using acrylic paint and an old credit card. I then used a sponge to darken the edges of the main image and tint the edges.

Making books

I have been busy making some books after some instruction by Julie Prichard in her Super Nova class.


Hand painted covers and watercolour deckle edged pages


Preprinted paper covers and standard notebook pages


Preprinted paper covers and watercolour pages.

Thursday 10 September 2009

Jigsaw Canvas


This is for a swap. It specified the size of the canvas and the jigsaw pieces and was to contain three pieces. The theme and colours were left open.

Saturday 29 August 2009

Purple ATCs


The purple papers are sprayed using ink sprays. The butterfly was die cut from the paper then embossed with script, black ink to pick up the script then embossed again using a butterfly embossing folder and finished off with some treasure gold. The mulberry paper was embossed in a folder and then I used purple and gold treasure gold to pick up the texture.

ATCs

A bit of a catch up of some ATCs I've made over recent months. This swap involves a guessing game where we see if we can spot who made which ATC and so I can't put the pictures up immediately. This means that I end up forgetting to post them at all so you can have them all at once in this post.


The theme was numbers. I used a teflon sheet and smeared some distress ink pads on and then sprayed with water before dipping the card into it. Dried then dipped again and again to get the final effect.

Theme was Impressionists. The background paper was made using three colours of acrylic paints picked up and dabbed on using some scrumpled up magazine page. The image was printed onto textured card to give the look of canvas.

Theme was Acetate. I die cut the butterfly from acetate then coloured using alcohol inks on one side and once embossed picked up the texture with black ink on the other side. Some beads attached the butterfly to the ATC and made the body, The background was made from several colours of acrylic paint. I used a stencil to dab on the purple border.

It girl gift notebook


The theme for this IT girl gift was children and so I made a holder for a small notebook that can be refilled when the notepad is finished.

Last meander page


This theme had me stumped for quite a while but in the end I decided to use a stamp I have that includes a song title.

Margaret's Angels


Margaret's theme for her IT girl was cemetery angels which I found quite difficult to tackle. I ended up with a collaged canvas piece.

Time ATC

Wednesday 8 July 2009

Backgrounds


Some backgrounds I made for a swap. I used watercolour paper for this background. The pattern is made from a thin plastic stencil I have. I first sponged gesso through the stencil over most of the paper. After it had dried I sprayed the sheets with three colours of Radiant Rain which has a bit of a shimmer as well as colour. When that was dry I sponged a dark blue acrylic paint through the stencil and left to dry again. Finally I mixed some of the blue paint with some black lava texture gel and used a palette knife to apply it over some of the blue paint. This all gives a layered effect and some texture too.

Saturday 20 June 2009

Lesson 7


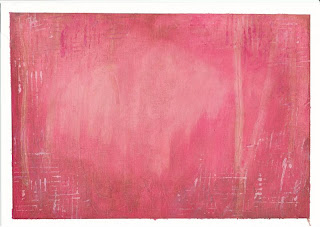
This lesson involved painting a pink picture. It was really pink half way through but the top layers of brown grunged it up nicely. It looks more bright pink in the scan than in real life. There are some lovely texture marks in the middle at the bottom where I used a palette knife to add one of the layers and the brown washes pick it up really well.

Lesson 6 of Layer Love

Sunday 14 June 2009

Monday 8 June 2009

Meandering again


The final page for Jacqui with some added pearly buttons to finish it off.


This is Annie's page. Her theme was play on words. I stamped a music background onto the base that she sent. I added some stitching on the side then sewed on a picture of a women with pan pipes layered over some netting. I embellished with some beads on the side and then added a dymo label with the text. A play on the piped music you get in lifts and telephones.

Sunday 7 June 2009

Vintage Meander page


This is Jacqui's page and her theme was vintage. I used sheer heaven paper and a collage sheet to transfer some text into the background. I then edged the page using my machine and sewed on a picture printed onto the sheer heaven paper. I was going to add some beads but I think I like it as it is at the moment. Will put it aside for a while to make up my mind.

Fourth meander page


This page is for Pauline C and her theme was nature. I stamped a flower onto the coloured background then sewed a fine fabric over the top. I embellished it with some beads and a dragonfly charm.

Saturday 6 June 2009

Another Meander page


This is Adrienne's page and her theme is dreams. I put a layer of net over the entire background and sewed a ribbon the side. I used the colours in the background to make a beaded embellishment to circle round the dream charm.

Meander pages

I am taking part in a swap to make a meander book. It consists of 8 square pages which are eventually sewn together to make a book. I decorated 7 pages and sent them out and people will decorate them in my theme and return them. I have 7 pages from other people sitting here ready to decorate in their themes. Each person has coloured their pages before sending out and have chosen a theme so the colour scheme and theme are set for each page.

I have finished the first two.


Eva's page. She wanted the page to scream orange and I hope I've managed that. I used some card that I had decorated with spray inks and a stencil then sewed some ribbon borders and some beads. I realised once I'd made it that the card was too thick to sew once on top of the base that Eva sent so the buttons and beads are glued on.


Pauline H's page, her theme was sea and sky. This had a vilene base which Pauline coloured and then I sewed on some fabric layers and some beads and a boat charm. The boat is only attached at the top so it moves around on the sea. The text was added using dymo tape.

Wednesday 27 May 2009

Lesson 3

Another lesson 2


Again this is so much greener and has more depth in real life. Don't know why these green ones are so hard to photograph. This is on canvas from a canvas pad and I love the texture you get.

Friday 22 May 2009

Lesson 2


This scan is much bluer than it is in real life. The real version is quite green and has more shades in the darker sections. Why is it so hard to get a good picture of these paintings?

Different colour version of lesson 1

Wednesday 20 May 2009

Maggi's IT girl


Maggi's IT girl theme was Literature/Movie/Song. I made a little pouch to carry a notepad. I used some pelmet vilene sprayed with ink sprays and then sewed on some stamped card. The stamp inspired me to use this song as the theme.

Layered background


I am doing a layer love online class with Julie Prichard at the Land of Lost Luggage and here is my first attempt at my first background lesson.

Friday 15 May 2009

House and Springtime Promises ATCs

The house ATCs have now been sent out so I can post up my version.


The background is radiant rain sprayed onto textured black paper. The house is a sprayed paper stamped and with a sprayed piece of book paper added. The words are dymo tape.

The previous month's theme was Springtime Promises and here is the ATC for this theme.


I created the effect using masking. I used a flower mask and sponged some colours over it then put a bird mask over that and sponged on more colour. The little piece added in the corner is made from a textured piece I made in this blog post and punched out.

Polymer clay brocade

I have finally had a chance to play with this technique. It is originally from Donna Kato's book - The art of polymer clay - creative surface techniques which is a book I have and love looking at. Adrienne challenged us to try this technique and has an excellent step by step blog post about it.

I am not entirely convinced by my first try mainly because I did not get a deep enough impression with the stamp and so the pattern isn't very clear in places. I still cut out lots of pieces though and here they are once baked


I made some moulded pieces too using a mould brushed with mica powders. I also just stamped into the left over clay and brushed with mica powders.

It is difficult to see the individual pieces in this photo so here are some closer ones.


Saturday 25 April 2009

Picture for Adrienne


I decorated a picture for Adrienne. I painted a children's papery frame with some micaceous iron oxide which looks a flat colour on this scan but is quite sparkly in real life. I then added the turquoise piece which has a background painted with acrylic shimmery paint. I then added a section with paint with fantasy film on the top (which looks green on the scan but isn't in real life). I added the fantasy film while the paint was wet and then zapped with my heat gun. Trimmed the edges where the fantasy film rumpled up. The final sectionis a piece of cardboard with moulding paste through a stencil to produce the textured swirl. I then added paint and embossing powder and more paint etc until it looked right, heating each layer as I went along because I have no patience. There is turquoise and purple paint on that one I think plus silver embossing powder. The silver was then too bright so I added more paint on top to tone it down. Added a few stick on silver bits to the side which I covered in blue treasure gold so it wasn't so bright and little key. It has a flip out stand at the back so she can stand it up like a picture frame or can add a hanger at the back and put it on the wall. A combination of experiments.

I hope that Adrienne likes it when it arrives in the post.

Wednesday 15 April 2009

Stripes


Was inspired by Tim Holtz to try some stripes using a brayer. Played with some different colours. I think I will remember for the future.

Sunday 22 March 2009

Masking ATC


My prototype for ATCs for a theme of masking. I sprayed a dictionary page with spray ink. I then put on a watered down partial coat of gesso. I put a mask on top and sponged on ink. Used some new Tim Holtz stamps to finish it off.

Wednesday 18 March 2009

Experiments

I have been experimenting with things so I thought I'd show you a selection of the results. Some I'm happier with than others. Most of these don't have a project yet but I'm sure they will be perfect for something one day. The technique I finally chose for the ATCs I was trying to design will be shown later on - the group I belong to keeps them secret until all are received and swapped out. The last experiment in this post was for another set of ATCs where the theme is masking so I think that's a good start for an ATC. Just have to design the rest of it now.


Some acrylics painted onto card then a crackle stamp on top. The right hand one has black ink, the left has versamark and gold embossing powder. They have a sheen in real life.


Micaceous iron oxide paint onto back of cereal packet quite thickly applied then used a stamp to create some texture. Once dried I put treasure gold on to pick up the texture. In real life it's rugged and shimmery and I love it. I think this will be a keeper.


Acrylics dabbed onto card

I saw a technique where you used gesso on a book page, embossed over the top and then sponged on ink. I tried that and produced some experiments and it wasn't quite what I wanted. So with this I first sprayed ink onto dictionary page. Then stamped and embossed the image. Then sponged on ink and then then ironed off the embossing powder.

This is the same thing but with the gesso. I didn't get as far as ironing off the powder so I may add more ink onto this one to rescue it or it may be used as it is.

For this one I sprayed ink onto page, applied some watered down gesso then used a mask and applied ink. I like this one. I tried it with no gesso and more gesso and this was the best one. I have a plan in mind for this one.